It may seem like a challenge to paste wallpaper around a switch on the wall. Thankfully, there are easy ways to get around this situaiton. Let us share those tips for you!
Instructions

- First, remove the plate covering the front side of the outlet. (This can be removed by hand)
- When the front plate is removed, detach the side plate of the switch. As this part is usually screwed to the main component, use screwdriver to remove it.
- Now you are ready to install the wallpaper!

- Put the wallpaper in the correct position, covering the power outlet. (Do not apply glue near the area of the outlet)
- Find where the outlet is located and feel the corners of the metal plate.
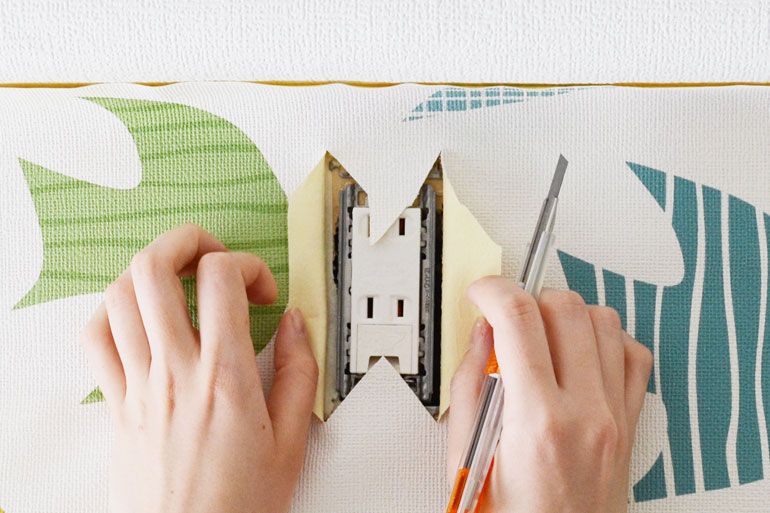
- As you find the corners of the metal plate, use a cutter to cut the wallpaper on the corner of the metal plate.

- When cutting, make sure to cut a x pattern as shown by the red lines in the picture.
- Afterwards, flip the cut wallpaper, uncovering the power outlet.
- Make a crease along wallpaper along the edges of the power outlet using a bamboo spatula.

- Cut the extra pieces of the wallpaper using a cutter and a ground spatula.
- After the wallpaper is glued, remove the glue on the outlet with a sponge.
- Put the removed plate coverings back and it’s done.
It’s quite easy isn’t it! The real challenge would be to locate the edges of the power outlet. Usually, the edges would be hidden by the metal plate.
For appliances that cannot be removed from the wall, such as air-conditioners or intercom, carefully identify the edges and make a similar cutting as shown above.
Watch the video instruction!


