 All Humanity Craftsmanship Plan (HOWTO)
Just remember a few tricks, and
you can paste patterned wallpaper in no time! The point is “pattern repeat” on the product page.
Once you get used to the “palatomic manga technique” of pattern matching, you are a fine pattern master!
See how to paste with live glue wallpaper video!
Full confirmation from the groundwork! 20 minutes Full version Movie
Check the flow in 5 minutes! 5 minutes short Ver.
See how to paste with photos and sentences!
Step1 Preparation before applying
What to prepare
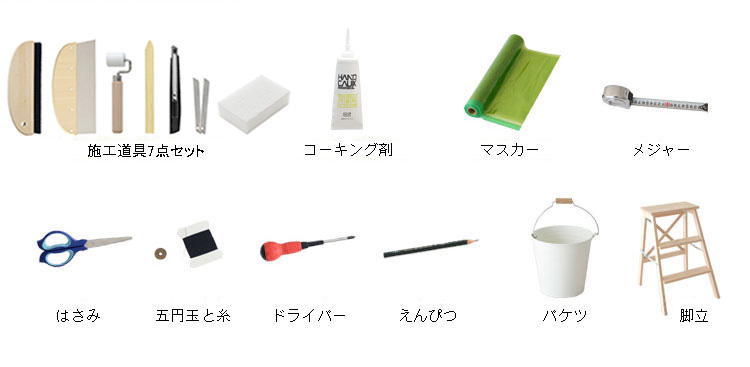
- Construction tool 7-piece set
- Caulking agent
- Masker
- major
- Scissors
- Five-yen coin and thread
- driver
- Pencil
- bucket
- stepladder
Remove what you can remove

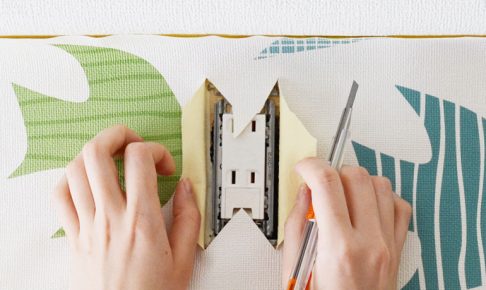
- Remove the outlet switch plate.
- When you remove the cover plate, the receiving plate will come out. Use a screwdriver to remove the screw.
- This is OK. Remove any other removable items such as curtain rails and hooks.
Step2 Prepare the ground
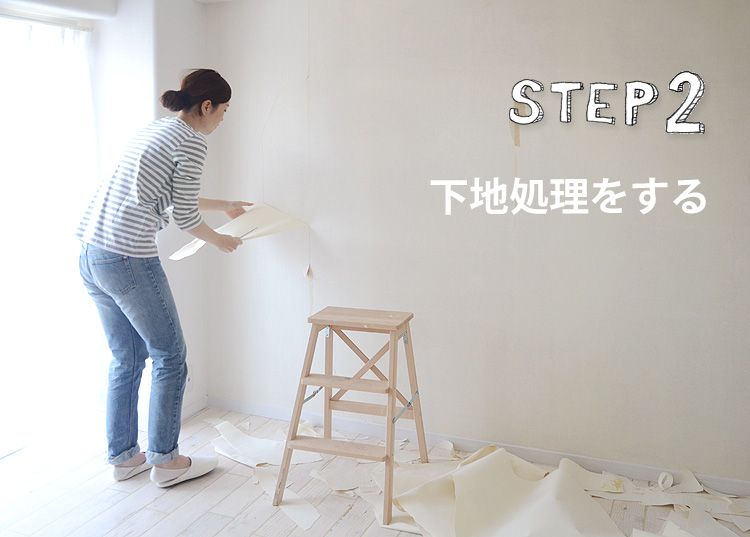
When removing old wallpaper

- Cut the edge of the wall where the wallpaper is pasted, and the surrounding area with a cutter .
- Make a light cut with a cutter in a suitable place and start peeling off.
- You can leave the thin backing paper, but remove the floating backing paper cleanly.

- If there is a step in the thickness of the backing paper, flatten with a putty.
- When the putty is completely dry after standing for a whole day or more , smooth it with sandpaper . Please note that the putty powder will fly.
When pasting without peeling

- Do not remove the old wallpaper. If you want to paste it repeatedly, wipe it off and clean the groundwork.
 * If the wallpaper turns up and floats, repair it with an adhesive.
 * If the wallpaper is lost, fill it with a putty.
Step3 Draw a reference line on the wall
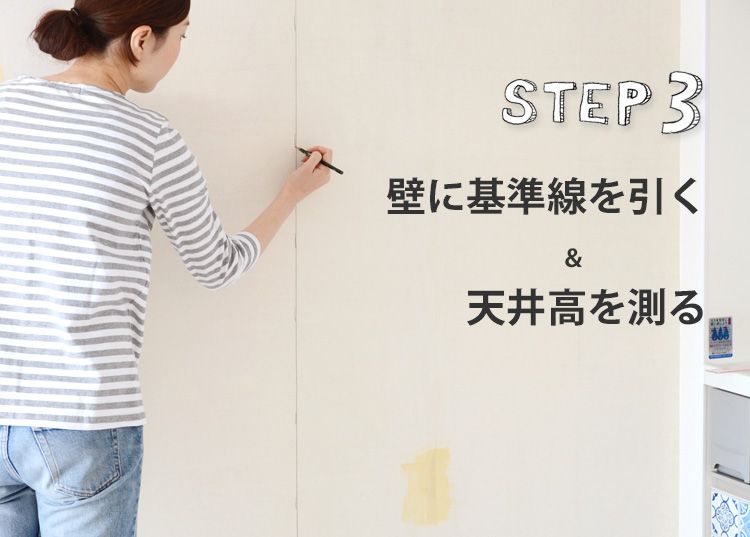
Draw a reference line

- Measure 90cm from the right edge at the beginning of pasting near the top and mark it.
- Prepare a 5-yen coin tied with a thread and hang the thread from the mark.
- Draw a vertical line with a pencil along the thread. (You can use the dotted line.) Take the thread and complete the reference line.
Measure ceiling height

- Measure the height from floor to ceiling with a measure and make a note of it.
POINT : Construction cannot be interrupted in the middle of the wall. Decide on the wall you want to put on that day, and finish it in the corner of the room.
Step4 Cut the wallpaper and fold it up
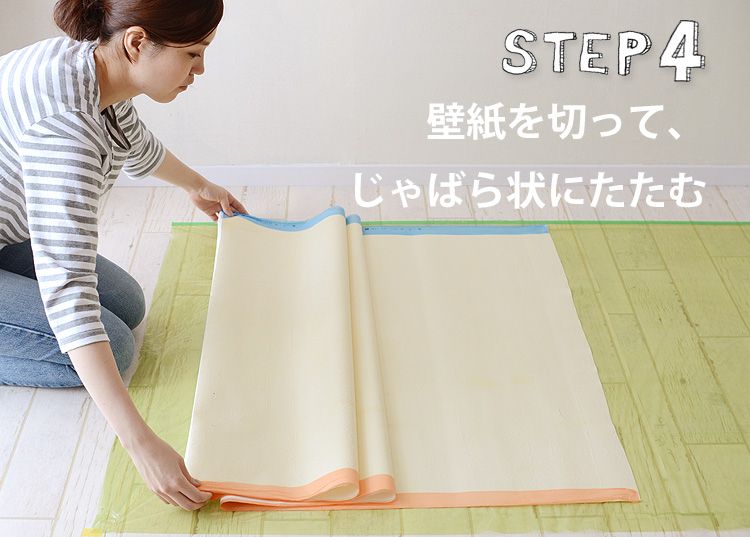
Cut wallpaper

- Cover the floor with a masker and roll up the wallpaper. Since it is easy to make a mistake in how to spread the wallpaper with raw glue, please check the video.
- For the first sheet, cut the wallpaper to a ceiling height + 10cm length. (From the second sheet onward, the pattern needs to be matched so cut it longer for the size of the pattern.)
- Turn the film. When you have turned all over, please roll and throw away.
When applying the glue yourself, apply the glue evenly with a roller bucket .
Fold in a loose shape

- Gently fold the surfaces together so that there are no creases.
- Please show how to fold with GIF animation and video.
If you apply the glue yourself, wait about 10 minutes to apply the glue.
* For wallpaper with a note on phase peeling
 We recommend that you do not perform the process of turning the film or folding it into a loose shape, but stick the film while peeling it off.
● What is peeling? When “back paper” with glue adheres to each other and peels off.
Step5 Paste the first sheet
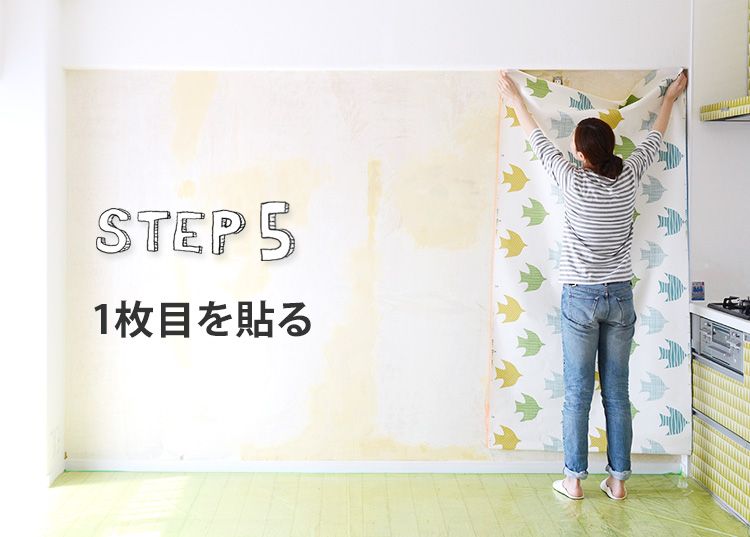

- Place the folded wallpaper at your feet and lift the edges to spread them out.
- Make an extra 5cm on the top and bottom, and paste it roughly.
- Paste the right side to the bottom and make a large slack on purpose.

- Align the left edge of the wallpaper with the reference line. Since the paste is fully applied, you can paste it and then move it.
- When the leftmost line is determined, use a brush to remove the leftmost air.
- Hold the right edge to wake up (turn) the wallpaper. Do not turn the left edge of the brush.

- Stroke the middle of the wallpaper from left to right with your hand and stretch the wrinkles.
- Next up diagonally from the middle.
- Next, gently stretch the wrinkles with your hand from the middle down diagonally.

- If you can paste it, use a brush to remove the air in the order shown and crimp the whole.
Step6 Cut the excess
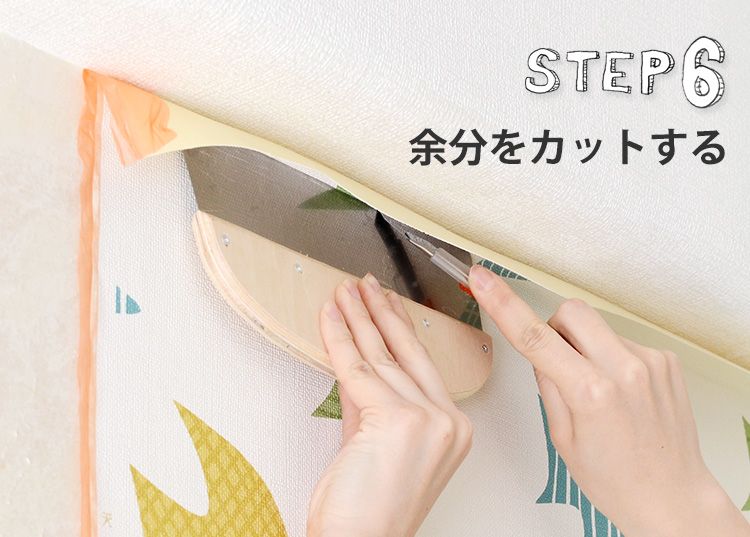
Make an extra crease

- Stroke the corner with your fingertips and send the wallpaper into the corner.
- Using bamboo spatula , first crease the wallpaper from the corner of the right end.
- Next, crease the upper and lower sides. The point is to fold the corners in half.
Cut the excess by applying a local spatula

- Place the ground spatula on the corner and cut from the top and bottom with a cutter. Cut the corners in two layers. When you start cutting, slide the cutter without removing it from the wall.
- Next, cut the excess at the right end vertically in the same way.
POINT : There is a direction to hit the local bella. Place the sharp edge of the blade in the corner and turn the rounded edge in the direction of advancement.
Wipe off the glue

- After removing the excess cut
- Wet the sponge and squeeze it tightly.
- Wipe off glue on the surrounding walls and skirting boards. If the glue remains, it may cause discoloration.
Step7 Paste the second piece
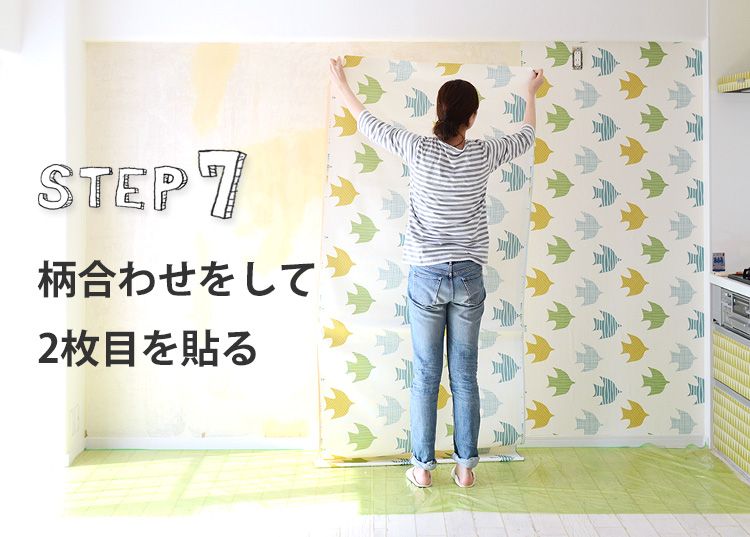
Cut the wallpaper to match the pattern

- Since pattern matching is required from the second sheet, cut it longer by the size of the pattern, or hit the wall and cut where the pattern matches.
- The length of the pattern can be confirmed by referring to the information on “Standard → Pattern Repeat → Vertical ○○ cm” on the product page.
- Remove the first side tape.
Match the pattern and paste

- Paste the second piece 3 ~ 4cm on the place where you want to overlap, and lower the left edge to make a slack.
- Shift the right edge and paste it so that the pattern matches.
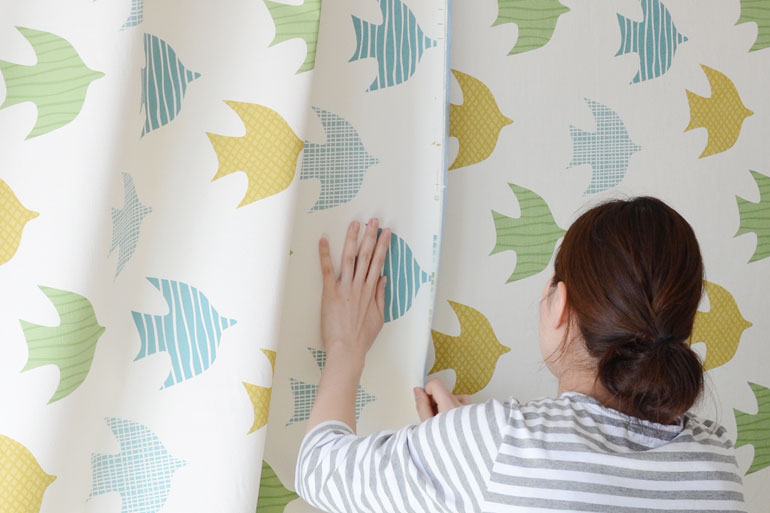
- Turn it like a flip book, and paste it while checking if the pattern fits perfectly.
It is easy to understand by cutting a part of Mimi!

- If you are not good at the above-mentioned method, it is easier to understand if you cut a part of Mimi.
- In this way, cut with the pattern. Cut about 1cm on the side and cut several centimeters on the length to match the pattern.
- Shift the wallpaper until the pattern matches. From the ceiling to the floor, paste it while checking if the pattern fits perfectly.
I will paste everything

- Once the rightmost line is determined, vent the air with a bucket.
- Hold the left edge to wake up the wallpaper. Don’t turn the right edge of the brush.
- Stroke the middle of the wallpaper from right to left with your hand and stretch the wrinkles.

- Next up diagonally from the middle.
- Next, gently stretch the wrinkles with your hand from the middle down diagonally.
- If you can paste it, use a brush to remove the air in the order shown and crimp the whole.
Cut extra

- Like the first one, stroke the corner with your fingertips
- Make a crease with a bamboo spatula
- After cutting the top and bottom excess, wipe around with a sponge.
Step8 Cut joints (joints)
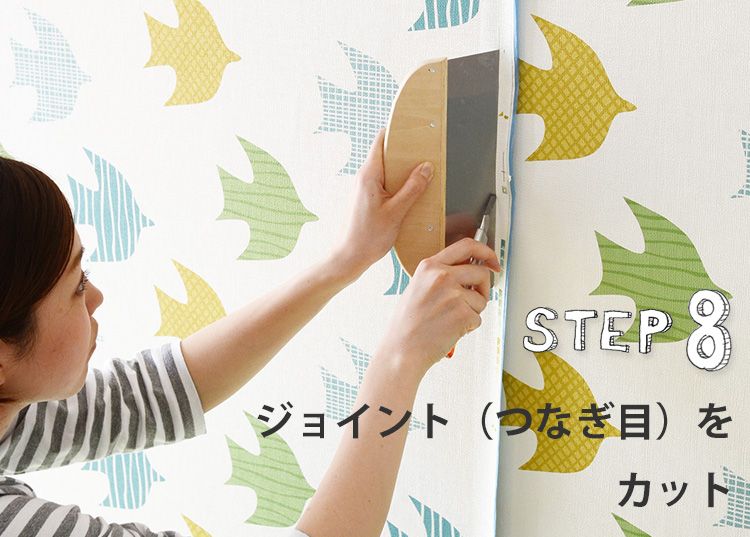
Cut joint

- Fold the cutter blade frequently and always keep it sharp. Make sure to fold the joint cut.
- Turn over a little and check where there is a pattern of overlap and top and bottom.
- With the sharp edge of the local bera on the top, we will cut two places where there is an upper and lower pattern in the middle of the overlap. When you start cutting, slide the cutter without removing it from the wall.

- Cut only 2 wallpapers. Since it is necessary to be careful not to cut even the groundwork, practicing power adjustment with a piece of wallpaper etc. ◎ You can also use
“joint underlay” . -
At the bottom several centimeters, cut from the bottom to the top with the pointed side of the ground bera down.
Take extra and crimp

- Remove the cut excess.
- Turn over the joint, and be sure to remove the tape on the back of the second piece and the first piece.
- Crimp joints with joint rollers. If there is a gap, there is a way to repair it. (At Step10)
Step9 Paste the last one
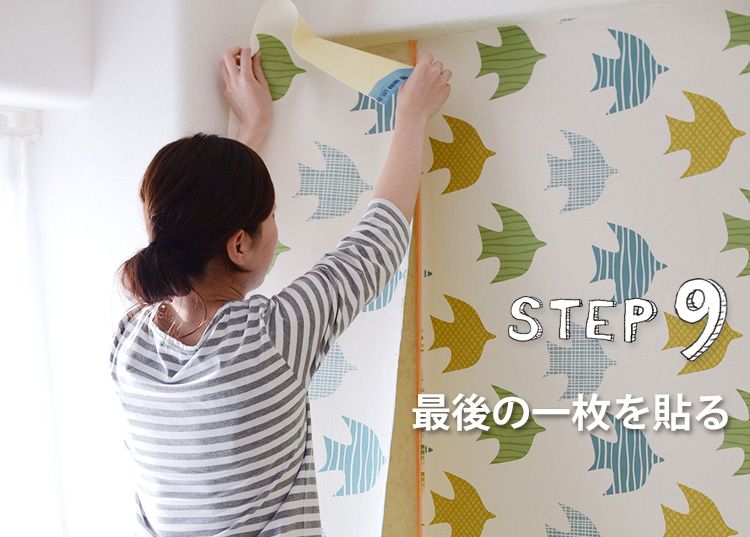
Measure the remaining width and cut the wallpaper

- I’ve got the last one. Measure the width of the remaining wall.
- With the wallpaper folded up, cut the remaining wall width + 10cm width.
Paste the last one

- Remove the side tape of the wallpaper.
- Paste the pattern together.
- Remove air with a brush.

- Stroke the corner with your fingertips and gently send the wallpaper to the corner.
- Make a crease with a bamboo spatula in the corner of the vertical.
- Fold the corners in half and crease the top and bottom corners.

- Place the ground spatula on the corner and cut from the top and bottom with a cutter. Cut the corners in two layers.
- Next, cut the excess of the leftmost vertical in the same way.
- Remove the excess and wipe the glue off around with a sponge.

- Cut the joint.
- Take extra
- Crimp with a joint roller .
Step10 Add caulking agent around
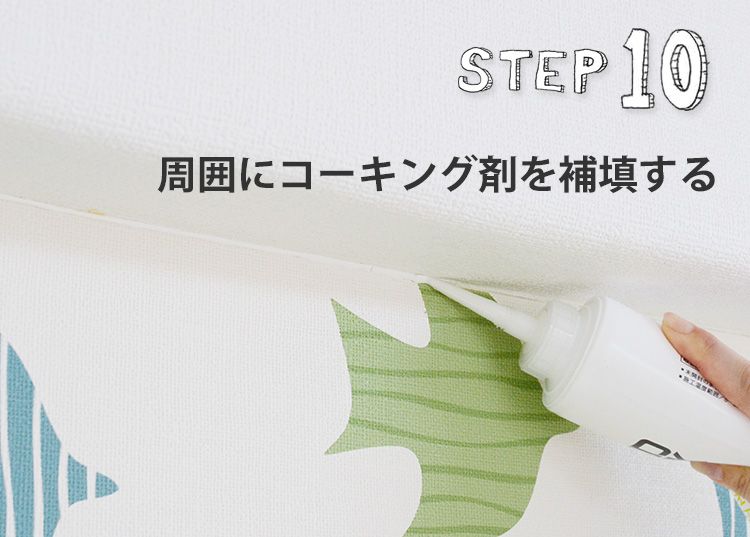
Caulking around

- Cut the mouth of the caulking agent diagonally. (The caulking agent is “hand coke” or “joint coke” or “Penette” that comes with the beginner set .)
- We will inject caulking into the corner.
- Trace with your finger. Please wipe your finger from time to time with a sponge.

- Wipe gently with a sponge squeezed hard.
- When you are finished using it, wipe it off, cover it, and store it in a place that is not exposed to the sun.
Repair joint gaps

- If the gaps in the joints are open, it can be made inconspicuous if the wallpaper has a color that matches the caulking agent such as white.
- Pour caulking agent into the gap
- Stroke with your finger and blend in.

- Wipe gently with a sponge squeezed hard.
- I didn’t stand out. Click here for “Penette”
recommended for gap repair >>
Completion

