European wallpapers generally have about 53CM WIDTH, and most of them use NON-WOVEN fabric backing.Even under moist conditions, non-woven wallpapers do not expand or contract a lot, so it is possible to directly apply glue on the wall instead of on the paper when installing.

Also, European wallpapers do not have a part called “Mimi” like common Japanese wallpapers, the difficulty level is significantly lower for first time DIYers!
It is time you take control of what your house looks like… Decorate that wall now!
VIDEO DEMONSTRATION
STEP BY STEP INSTRUCTION
STEP 1: MIXING POWDERED GLUE
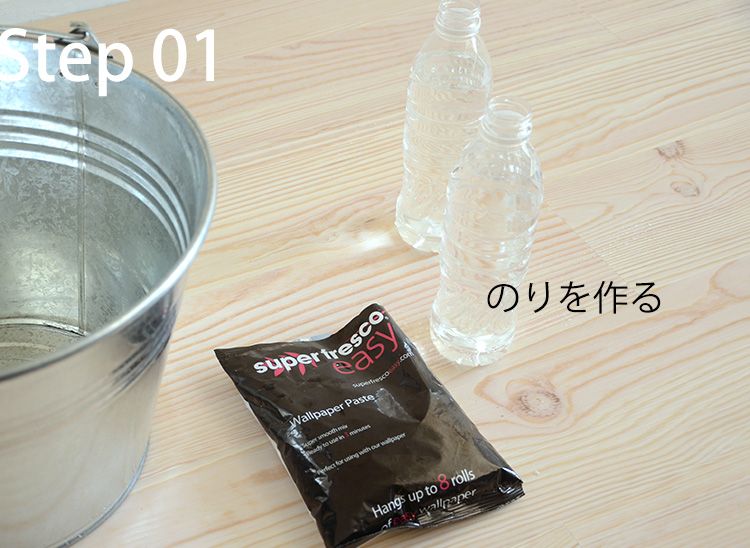

- Prepare the required amount of water according to the glue package, and pour in the glue powder.
- Stir thoroughly. When all the powder is mixed in, leave it for about 40 minutes and stir further.
- Stir until the powder lumps are all gone, then you can move on to the next step.
STEP 2: PASTING THE WALL
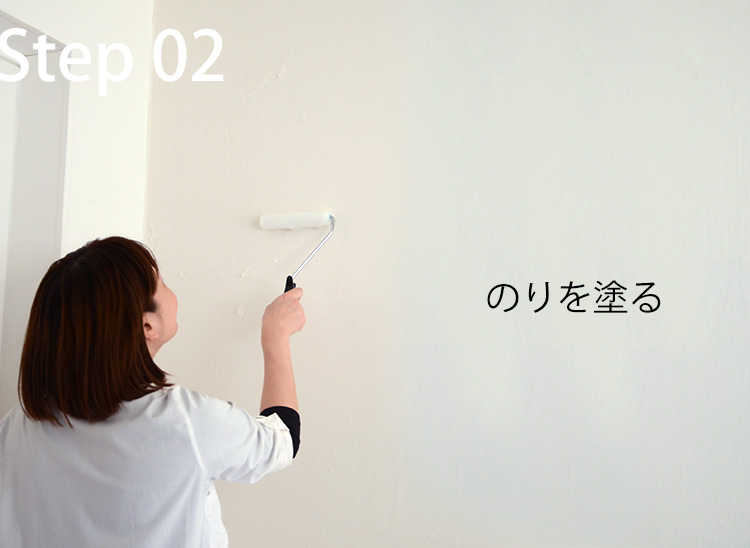

- Apply the glue thoroughly on the wall so it is easy to fine-tune the position of the wallpaper and re-paste if needed.
- Next, apply a little more glue than one width of wallpaper to be pasted, especially between the seams and edges.
- If you are right-handed, it is easier to do the last vertical cut by pasting from left to right (likewise for lefties).
*Depending on the wallpaper, the direction of the beginning of the roll of the wallpaper roll may be different.
Be sure to check the direction of the wallpaper pattern before installing.
STEP 3: APPLYING THE FIRST STRIP
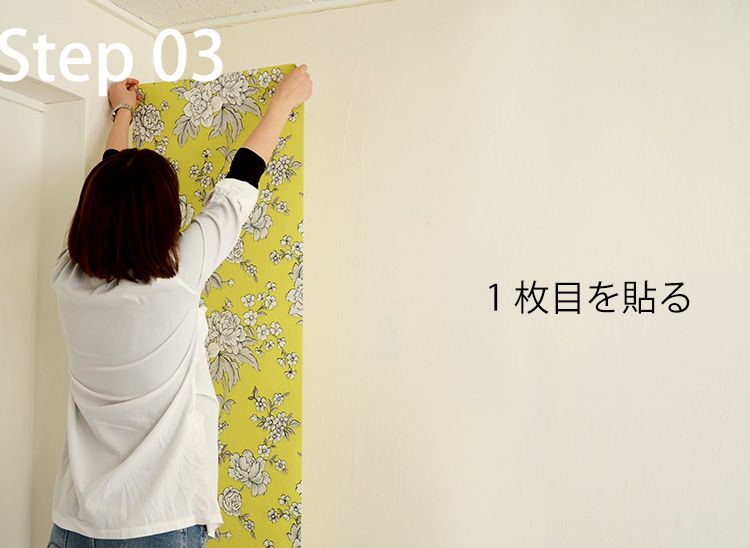

- Stick the edge of the wallpaper to the left edge of the wall. Leave about extra 5cm above and below.
- Use a smoother to flatten out the wallpaper. Smooth it out up and down from the center of the wallpaper.
- Even if it is misaligned, it can be re-positioned as many times until the glue begins to dry, no need to panic as you restart.
STEP 4: CUTTING OUT THE EXCESS WALLPAPER
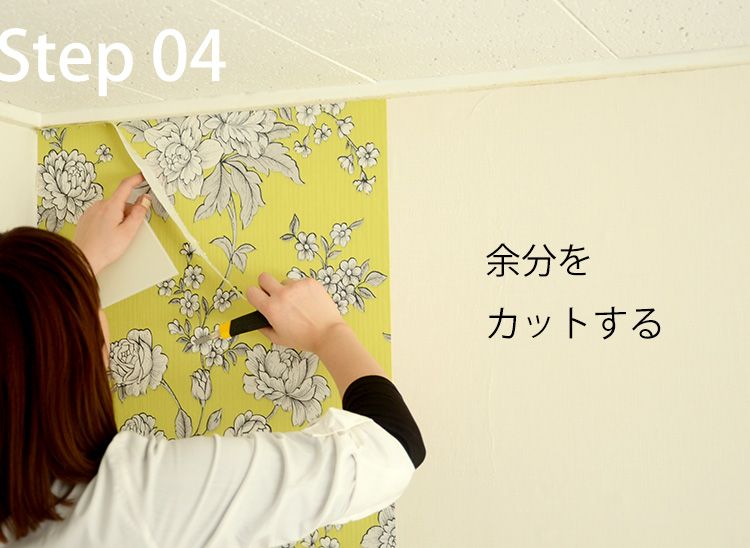

- Make sure that the upper and lower edges of the wallpaper (excess) are creased. Use a smoother / bamboo spatula to assist with creasing.
- Use a smoother / ground spatula as a cutting guide to cut the excess wallpaper. Once removed, wipe the remaining glue around the edges with a sponge or cloth.
- Fold the blade of the cutter frequently and always keep it sharp. This leads to a more beautiful finish around the edges.
STEP 5: APPLYING THE SECOND STRIP
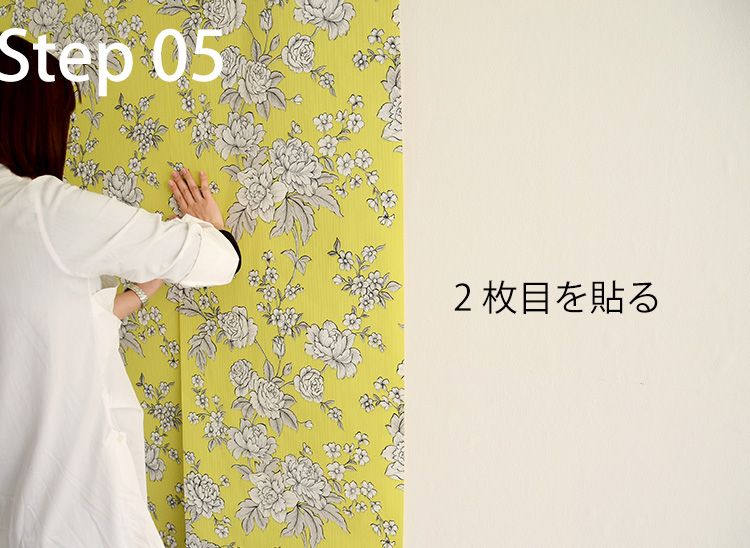

- Paste the wall just like the first strip before.
- While matching the pattern of the next wallpaper, determine the position of the wallpaper from the joint.
- After cutting the upper and lower excess wallpaper, press the seams with a joint roller.
STEP 6: APPLYING THE THIRD STRIP (AND THE REST)
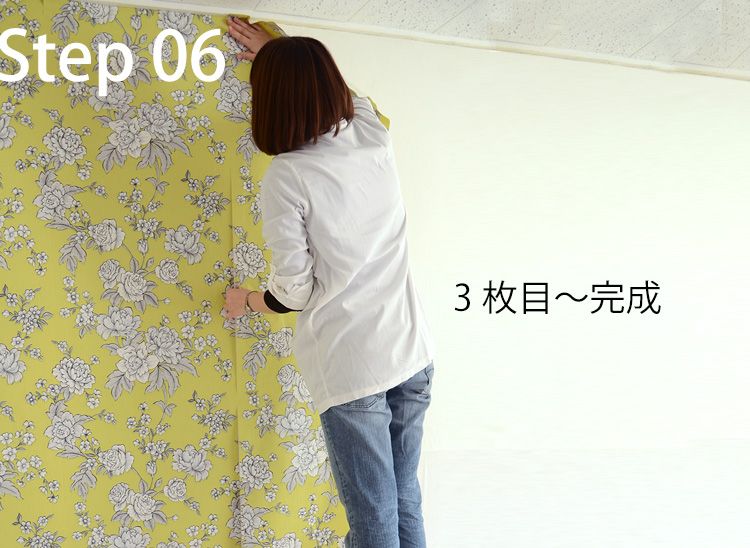

- Follow the third and fourth pieces together with the pattern in the same way as the second piece.
- Make sure that the last right-hand excess is well-cut. Use a smoother or ground spatula as a cutter guide to remove excess.
- Use a sponge or cloth to clean the remaining glue around the edges. Installation is complete!
How to peel

Gently peel off the wallpaper from the edges.
The remaining glue on the wall can be cleaned with water.
*Wallpaper other than non-woven fabric cannot be removed.
If you use wallpaper other than non-woven fabric (fleece), the paper backing may remain when you peel it off.
The paper residue can be removed by using water to wet it first.
INSTALL AN EUROPEAN (NON-WOVEN) WALLPAPER WITH HONPO TODAY!
Browse through our collection of European wallpapers today and find what you need!
You can also purchase Installation tools from us~

1 thought on “Installation GUIDE: European (Non-Woven) Wallpaper”
Comments are closed.